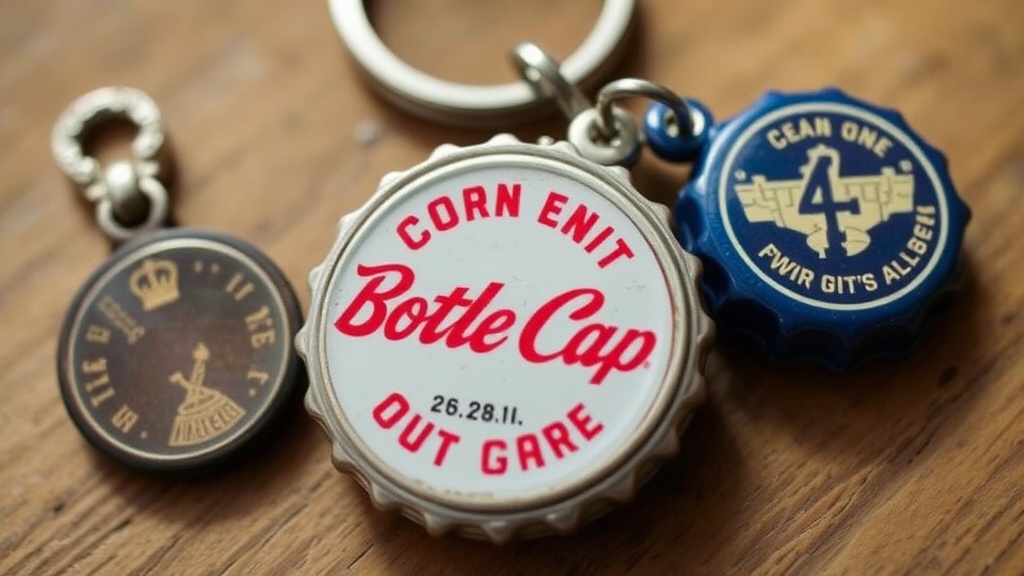
How to Clean and Restore Vintage Bottle Cap Keychains at Home

Vintage bottle cap keychains carry decades of branding history, roadside-diner nostalgia, and the kind of patina that turns a five-cent trinket into a conversation piece. This guide walks through every step of cleaning and restoring those keychains at home—whether the goal is stabilizing rust, removing sticky residue, or bringing back the original metal shine without destroying the paint. You don't need a professional conservation lab. A few household tools, some patience, and the right technique will keep a collection intact for years.
What's the Safest Way to Clean a Vintage Bottle Cap Keychain?
The safest approach is always to start with the gentlest method and escalate only when the damage demands it. That means warm water, mild dish soap, and a soft microfiber cloth come first—every single time. Aggressive scrubbing or harsh chemicals can strip paint, dull chrome finishes, and wear down stamped logos that make these pieces collectible.
Fill a small bowl with lukewarm water and add a drop of Dawn dish soap. (Hot water can loosen adhesive liners inside the cap, so lukewarm is the sweet spot.) Submerge the keychain for two to three minutes, then gently wipe the surface with a cloth. If grime lifts off, rinse and pat dry immediately. Here's the thing: moisture is the enemy once the cleaning stops. Leaving a wet cap on the counter invites rust to return within hours.
For caps with paper liners or cork backing, skip the soak entirely. Instead, dampen a cotton swab and work around the edges. Waterlogged cork crumbles, and paper liners swell—both are common on pre-1960s soda and beer caps. The catch? Some collectors actually want the original liner intact, even if it's stained. That patina tells a story. If the liner is rotted, document it with a photo before removing it. Future buyers appreciate the provenance.
What Household Supplies Work Best for Restoring Old Bottle Caps?
You probably already own most of what you'll need. A basic restoration kit includes mild dish soap, distilled white vinegar, baking soda, cotton swabs, microfiber cloths, and a soft-bristle toothbrush. For tougher jobs, add Bar Keepers Friend powder, Evapo-Rust solution, and Cape Cod Metal Polishing Cloths.
Distilled white vinegar dissolves light oxidation. Mix equal parts vinegar and water in a non-reactive container—glass or ceramic works fine. Drop the cap in for five minutes, then brush gently with a toothbrush. Rinse thoroughly. If the cap still shows tarnish, make a paste from baking soda and water. It acts as a mild abrasive. Rub it in small circles for thirty seconds, then rinse.
Bar Keepers Friend is a stronger option for chrome-plated steel caps with surface rust. Wet the cap, sprinkle a tiny amount of powder on a cloth, and rub lightly. Don't use the steel-wool side of any sponge. Worth noting: Bar Keepers Friend can lighten paint over time, so test it on the underside rim first. For caps with heavy rust, Evapo-Rust is a safer bet than vinegar. It's a water-based solution that removes oxidation without attacking paint or plastic. Soak overnight, rinse, and dry.
| Supply | Best For | What to Avoid |
|---|---|---|
| Warm water + dish soap | General grime, dust, fingerprints | Soaking cork or paper liners |
| White vinegar (diluted) | Light oxidation, tarnish | Leaving caps submerged too long |
| Baking soda paste | Surface stains, mild rust | Heavy scrubbing on painted areas |
| Bar Keepers Friend | Chrome caps with surface rust | Direct contact with painted logos |
| Evapo-Rust | Deep rust on steel or iron caps | Using on aluminum (it won't harm it, but it's unnecessary) |
| Cape Cod Cloths | Final polish, restoring luster | Over-polishing matte finishes |
Polishing is the final step. Cape Cod Metal Polishing Cloths work well on chrome, brass, and copper finishes. Wipe the cap in straight lines, not circles, to avoid creating swirl marks. Then buff with a clean microfiber towel. If the cap feels slightly oily after polishing, that's normal—it helps prevent future tarnish.
Can You Remove Rust From a Bottle Cap Keychain Without Ruining the Paint?
Yes, but it depends on how deep the rust has eaten into the metal and whether the paint is already flaking. Surface rust—that reddish-brown dust you can wipe off with a finger—usually comes off with baking soda or diluted vinegar. Deep pitting is a different story. Once rust penetrates the metal beneath the paint, the paint will likely lift no matter how gentle the method.
For surface rust, try the baking soda paste method first. Dab the paste onto the rust spot and let it sit for ten minutes. The mild abrasion loosens the oxidation while the alkaline pH neutralizes the acid that drives corrosion. Wipe away with a damp cloth. Repeat if needed. That said, never use a wire brush or sandpaper on a painted cap. Those tools strip paint faster than they remove rust.
When rust has settled into the rim or the underside of the cap, Evapo-Rust is the collector's friend. Submerge the cap for four to twelve hours—no scrubbing required. The solution pulls iron oxide away from the metal without touching paint, plastic, rubber, or chrome. Rinse with water, dry immediately, and inspect. If small spots remain, a cotton swab dipped in the solution can target them precisely.
Some vintage bottle cap keychains—especially those from the 1970s and 1980s—have lithographed designs rather than painted ones. Lithography sits closer to the metal surface and is more fragile. For these, skip abrasives entirely. A damp cloth with a tiny drop of oil (mineral oil or even baby oil) can lift surface rust while protecting the image. Blot excess oil with a paper towel so the cap doesn't attract dust.
After rust removal, always seal the metal. A thin coat of Renaissance Wax or even a quick spray of WD-40 Specialist Long-Term Corrosion Inhibitor creates a barrier against humidity. Apply it to the inside rim and the back of the cap, keeping it away from any keychain hardware that moves. For more on conservation-grade materials, the Smithsonian Museum Conservation Institute offers excellent guidelines on metal artifact care.
How Do You Remove Sticky Residue and Grime From Bottle Cap Keychains?
Old price stickers, tape residue, and dried soda spills are common on thrift-store finds. The best solvent depends on what's stuck to the cap. For paper-based residue, warm soapy water usually softens the adhesive enough to scrape away with a fingernail or wooden pick. For plastic-tape glue or sticker residue, use a small amount of Goo Gone or un-du adhesive remover.
Apply the solvent to a cloth first—not directly onto the cap. This prevents the liquid from seeping under the paint or into a cork liner. Let the cloth sit on the residue for thirty seconds, then rub gently. If the cap has a painted logo, test the solvent on the rim before touching the design. Some vintage paints react poorly to citrus-based solvents and can cloud or soften.
For caps that smell like decades in a basement—musty, smoky, or just plain stale—odor removal is part of the restoration. After cleaning, seal the cap in a small container with a bowl of baking soda or activated charcoal for forty-eight hours. Don't let the powder touch the cap directly. The charcoal absorbs odors without adding moisture. Some collectors in Brooklyn swear by leaving caps in a paper bag on a fire escape for a day (the circulating air helps), but indoor charcoal is safer and more consistent.
Grime inside the crimped edges—the ridged skirt around the cap—can be tricky. A soft toothbrush works for loose dirt. For compacted gunk, an interdental brush (the kind made for braces) reaches into those tight ridges. Dip it in soapy water and work around the edge. Rinse by holding the cap under a slow stream of water, logo-side down, so water doesn't pool inside.
How Should You Store Restored Bottle Cap Keychains?
Storage is where restoration pays off—or falls apart. Even a perfectly cleaned cap will rust again if it's tossed in a shoebox in a humid closet. The ideal environment is cool, dry, and stable. Aim for relative humidity below fifty percent. If you live in a place like Gowanus or Red Hook where basement dampness is a known issue, a small dehumidifier near the collection area is worth the investment.
Store individual keychains in archival polyethylene sleeves or small acid-free coin flips. These prevent caps from rubbing against each other and protect against dust. Avoid PVC-based plastics—they release chlorine over time, which corrodes metal. For display, shadow boxes with UV-protective glass work well. Keep them away from direct sunlight, which fades lithographed colors faster than you'd expect.
If the keychain includes leather, fabric, or plastic components, separate storage considerations apply. Leather tabs dry out and crack in low humidity. Fabric loops mildew in high humidity. Plastic split rings from the 1980s can become brittle. Inspect the entire assembly, not just the cap. Sometimes the best move is to replace a rusted split ring with a new stainless-steel one from a hardware store like The Home Depot—just save the original in a labeled envelope if resale value matters.
Finally, document the work. Take a before-and-after photo. Note the cleaning methods used. If a cap gets sold or traded later, that documentation builds trust. Collectors—especially in the Bottles, Caps & Smalls community—value transparency. A restored cap isn't a secret. It's a rescued piece of history.
Steps
- 1
Gather Gentle Cleaning Supplies
- 2
Soak and Brush Away Grime
- 3
Dry, Seal, and Store Properly